Tuesday, November 24, 2009

A Pink Magnolia Christmas


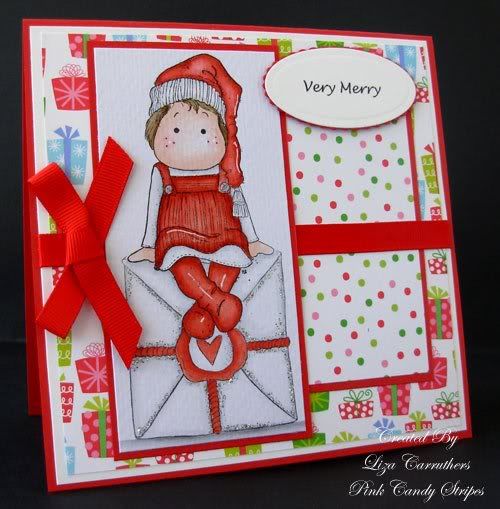
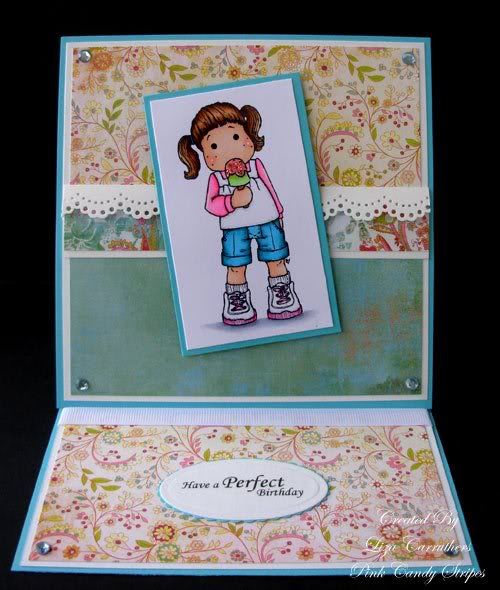
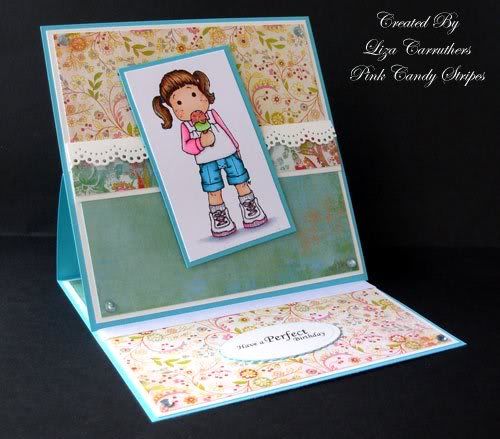
Hello everyone, today's card was made to match the gift card holder that I made in my previous post. I am entering it for four challenges; Just Magnolia Challenge 32 which has a theme of masking, Creative Card Crew Challenge 38 which has a theme of favourite things..... my favourite colour is pink, and Magnolia Down Under Challenge 27 and this week's Papertake both have a theme of Christmas.


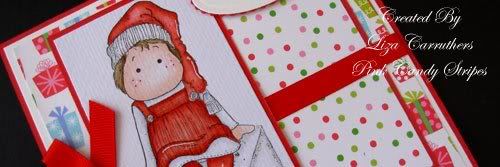
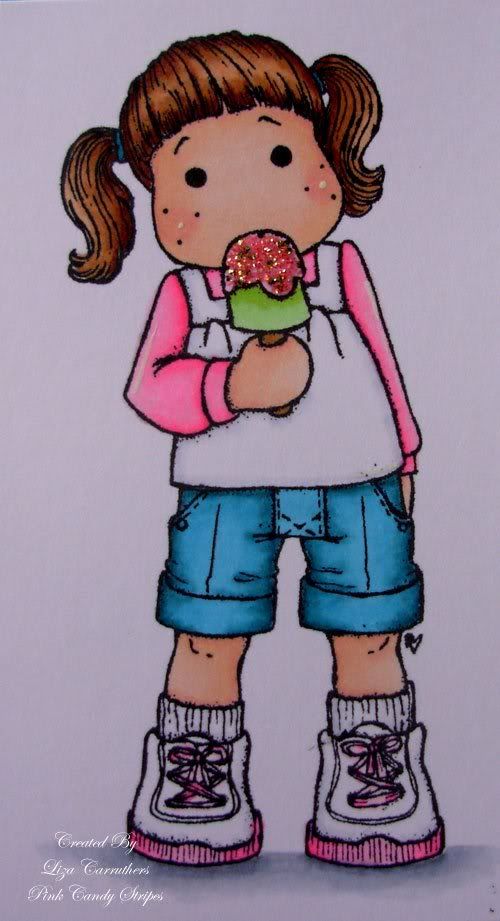
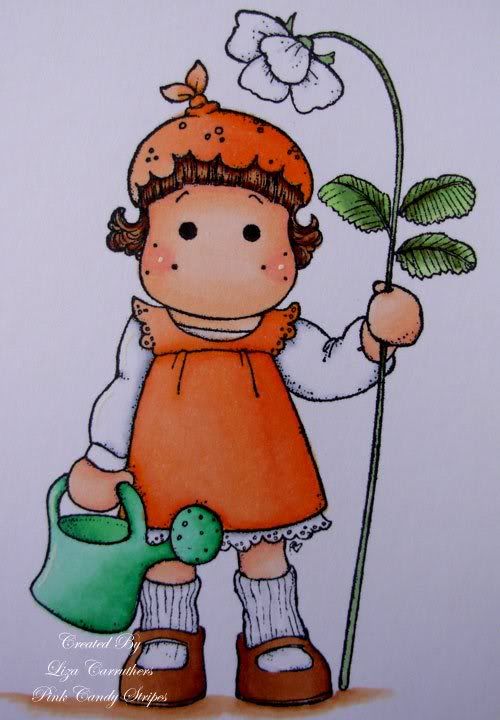
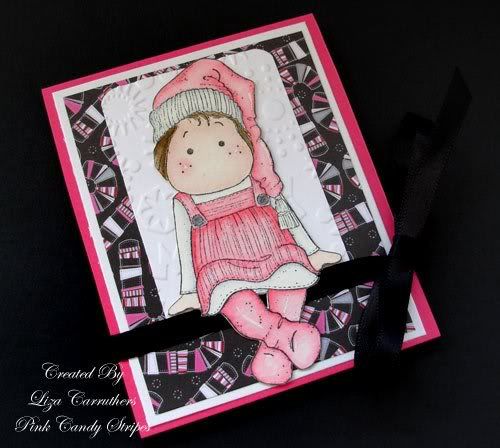
For my card I have masked Tilda with Yulehat so she is sitting on the Big Christmas Ornament and both are from the Magnolia Christmas Collection 2008. My image is coloured with distress inks and embellished with silver stickles for a bit of bling! The embossing has been done using my snowflake folder and the flowers, ribbon etc are from my stash.


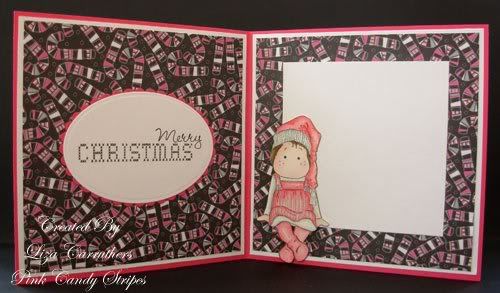
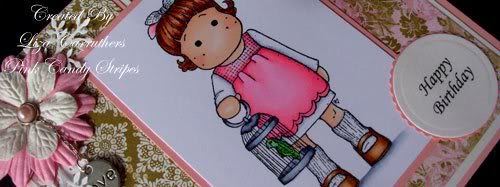
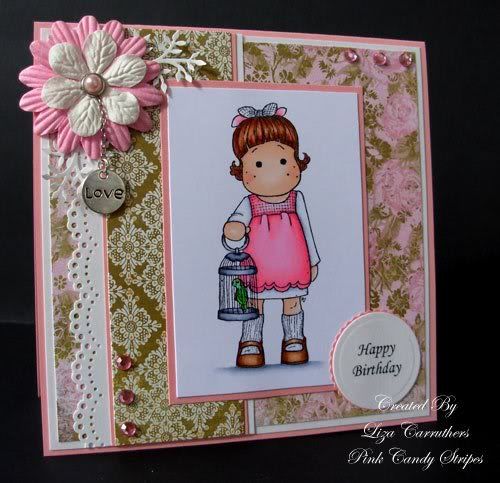
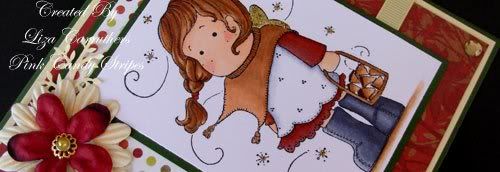
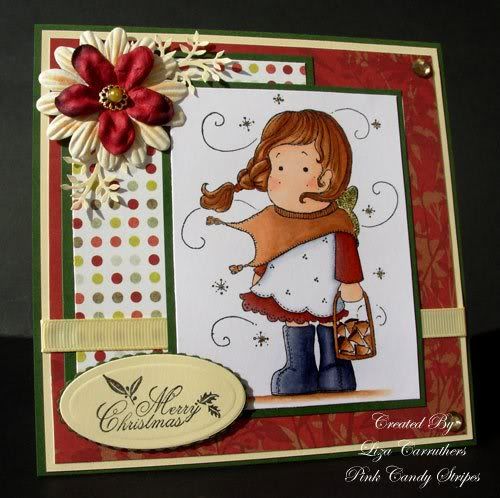
For the inside I have coloured Tilda once again, but this time I cut her out and popped her at the side of the greeting space. My DPs are from DCWV and the sentiment is also from the Magnolia Christmas Collection 2008.


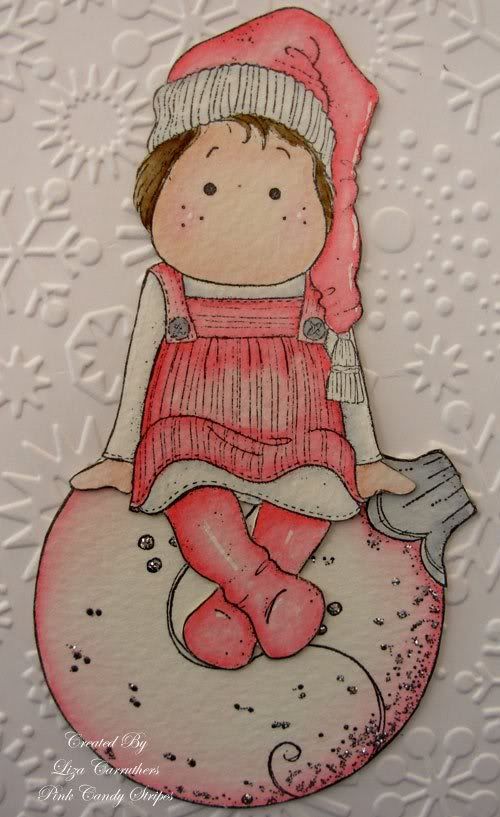
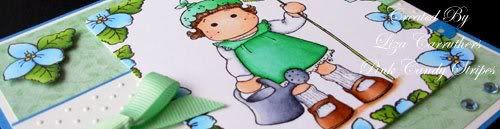
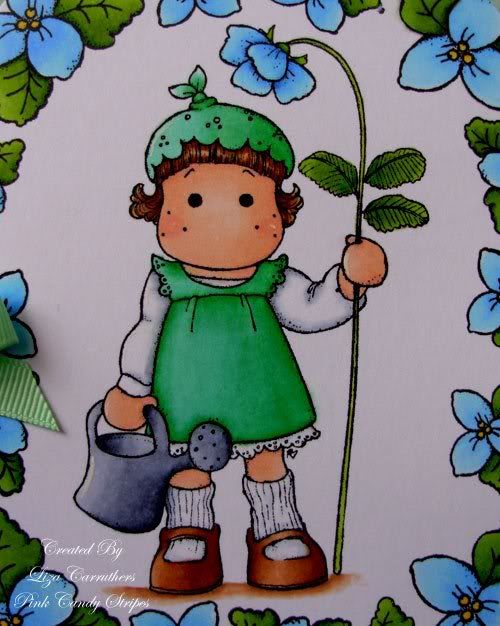
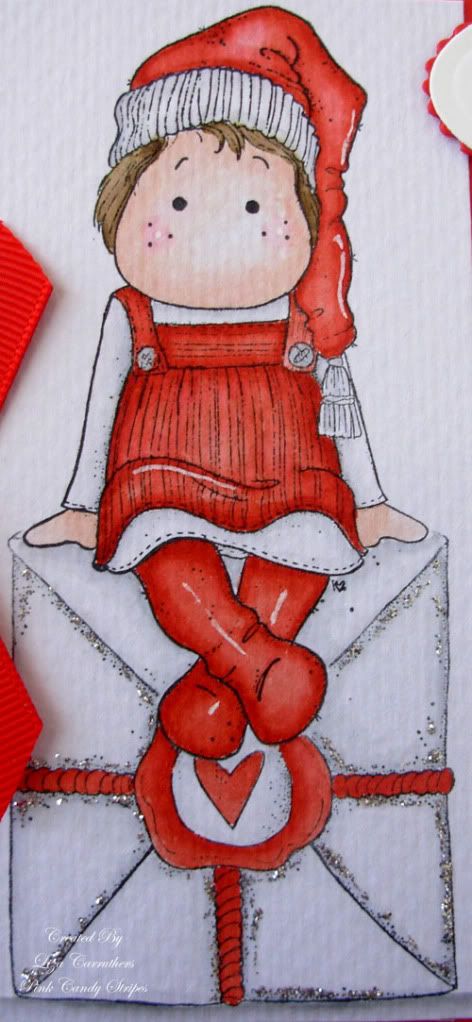
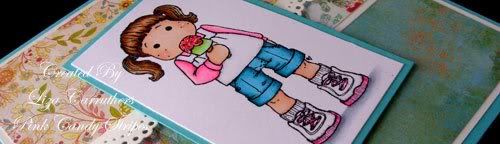
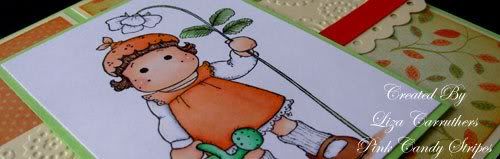
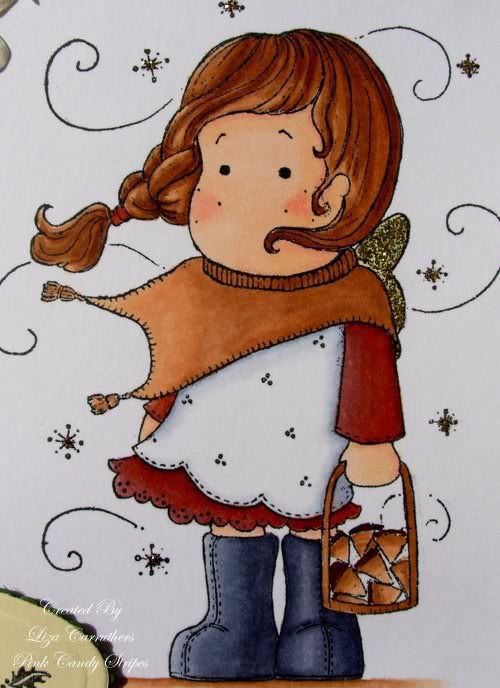
As usual, a close up of my image.


Supplies
Card/Paper: Pink and white card, DCWV - Rose tinted christmas
Stamps: Magnolia - Christmas Collection 2008
Colouring: Distress inks - tattered rose, worn lipstick, walnut stain, weathered wood, black soot, inkssentials pen for highlights
Embellishments: Flowers, ribbon, chain, charm, jewels brad, stickles
Tools: Cuttlebug, nesties, MS snowflake punch, snowflake folder, corner rounder punch

Thanks for looking x

Monday, November 23, 2009

Gift Card Holder Tutorial

Here is a quick tutorial to show you how I make my gift card holders.


Step 1: Take a piece of card measuring 25 x 10 cms and score at 5 cms and 15 cms - on the image I have marked the score lines in black so they are easier to see.


Step 2: Turn the card and score at 1 cm and 9 cms


Step 3: Cut and remove the pieces as shown in the picture and shape the remaining tabs by cutting off the corners.


Step 4: Fold along all the score lines and apply double sided tape or a strong glue of your choice to the back side of the tabs.


Step 5: Remove the backing tape, fold and adhere to form a small pocket for your gift card.


Step 6: Your basic gift card holder is complete, all you need to do now is decorate it! It will stay close on its own or you can choose to keep it closed by using a small magnet, velcro or like me, incorporate a ribbon into your design.

For my finished gift card holder the papers are from DCWV, I have used my snowflake folder for the embossing and Tilda with Yulehat is from the Magnolia Christmas Collection 2008.
Thanks for looking x

Cupcake Challenge 67


Hello everyone, Cupcake Challenge 67 has a theme of Gift Card Holder this week..... nice and useful for this time of year becasue as well as gift cards they are also useful to give money in as a gift.

I have used Tilda with Yulehat from the Magnolia Christmas Collection 2008 and she is coloured with distress inks. The paper is from DCWV and the embossing has been done with my snowflake folder. The ribbon she is sitting on, wraps around the back and is tied to keep it closed, although the front is heavy enough to keep closed itself I just thought the ribbon looked nice incorporated into the design.


The inside is decorated with the same DP as the front, and I have added a panel where a greeting can be written.

This week we are lucky enough to be sponsored by Soft Pencil Digital Stamps and Elizabeth has very kindly offered a $20 gift voucher to spend in their store.

The rest of the DT have made some fabulous gift card holders, so pop over and take a look. I will be posting a tutorial shortly on how I made mine, so pop back later if you are interested.

Supplies
Card/Paper: Pink and white. DCWV - Rose tinted christmas
Stamps: Magnolia - Tilda with Yulehat - Christmas Collection 2008
Colouring: Distress inks - tattered rose, worn lipstick, weathered wood, walnut stain
Embellishments: Ribbon
Tools: Cuttlebug, snowflake folder, water brush

Thanks for looking x

Sunday, November 22, 2009

Stamptacular Challenge 34


Hello everyone, today's card is my DT card for Stamptacular Challenge 34 where we have a theme of Nature-tacular and you have to made a card that reminds you of outside using only fall/natural colours. This week we are sponsored by Cute Stamps and Cards and take a look at the prize.....
Yes, that's right.....four Magnolia stamps....how fantastic is that!


For my card I have used Tilda with Wood Basket from the Magnolia Winter Collection 2008 and she is coloured with copics and highlighted with gold stickles. The papers were received in a DT kit from Magnolia and the flowers, spcer, brad and jewels are from my stash.

The rest of the DT have excelled themselves as usual, so pop on over and take a look.

Supplies
Card/Paper: Green and cream card
Stamps: Magnolia - Tilda with Wood Basket - Winter Collection 2008, Sentiment - Studio G
Colouring: Copics - E00, E51, R20, 0, E21, E33, E35, E37, E29, E04, E08, C1, C3, C5, C7
Embellishments: Flowers, brad, spacer, ribbon, gold stickles and jewels
Tools: Leone em branch punch, cuttlebug, nesties

Thanks for looking x

Thursday, November 19, 2009

Just Magnolia Week 31


Hello again, this is my second posting for today as I just realized I was about to miss the challenge! I have had this card half finished for a few days and finished it up last night, then I was just looking through some challenges and I realized there is to be a new challenge on Just Magnolia tomorrow so I thought I'd better post it! So as you must have guessed, this card is for Just Magnolia Challenge 31 where there is a fabulous sketch to follow.


I went a bit mad with the flower accessory stamps on this one...as you can see!!! lol! I have used Strawberry Tilda and the beach flowers from the Magnolia Lazy Summer Days Collection and they are coloured with copics. The DP is MME and I have used my swiss dots folder for the embossing.

Supplies
Card/Paper: White and blue card, MME - Bloom and grow
Stamps: Magnolia - Strawberry Tilda and beach flowers - Lazy Summer Days Collection
Colouring: Copics - 0, B00, B32, Y17, Y02, YG03, G21, YG67, B39, E51, E00, R20, E21, E33, E37, E35, G05, G02, G00, C1, C3, C5, C7
Embellishments: Ribbon, jewels
Tools: Cuttlebug, swiss dots folder, corner rounder punch, Fiskars threading water punch

Thanks for looking x

Saturday, November 14, 2009

Merry & Bright


Hello everyone, my second card today is for Roses on Paper Challenge 24 that has a theme of Christmas, Cute Card Thursday Challenge 86 which has a theme of Glitter and also Charisma Cards Challenge 45 that has a theme of Merry & Bright.


I have used Tilda with Yulehat from the Magnolia Christmas Collection 2008 and the large present she is sitting on is from the Santa Collection 2008. Both are coloured with distress inks and I have highlighted the present with loads of silver stickles. The ribbon and DPs are from my stash, sorry I don't know the name of them.


Finally, my usual close up.


Supplies
Card/Paper: Red and white card, DPs from stash
Stamps: Magnolia - Christmas and Santa Collections 2008
Colouring: Distress inks - tattered rose, worn lipstick, fired brick, walnut stain, weathered wood, black soot, inkssentials pen for highlights
Embellishments: Ribbon
Tools: Water brush, cuttlebug, nesties

Thanks for looking x

MDU Challenge 26 & Copic Creations Challenge 15


Hello everyone, this card is for Magnolia Down Under Challenge 26 where they have a fab sketch to follow and Copic Creations Challenge 15 where you have to colour red hair.... a new one for me!


For my card I have used Tilda with Birdcage from the Magnolia Pet Collection and I have coloured her with copics. It was quite strange colouring her hair red as I usually do brown hair, but I really liked the end result. My DPs are from Basic Grey, my MS doily lace punch made an appearance again and the flowers, charm, jewels etc are from my stash.


As usual, my close up.

Supplies
Card/Paper: White and pink card, Basic Grey - Sugared
Stamps: Magnolia - Tilda with Birdcage - Pet Collection
Colouring: Copics - E21, E37, E08, R20, E00, E51, R21, R23, RV10, C1, C3, C5, C7, 0, Y06, G02, G05, E33, E35, E37
Embellishments: Flowers, chain, charm, PM pearl brad, jewels
Tools: MS doily lace punch, cuttlebug, nesties

Thanks for looking x

Friday, November 13, 2009

Secret Crafter Challenge 57


Hello everyone, today's card is for Secret Crafter Challenge 57 where the theme is to make an easel card. Well easel cards are my total favourite at the moment, so I don't need an excuse to whip one up! lol!


I have used Tilda with Bike from the Magnolia Lazy Summer Days Collection and I have coloured her with copics. The DP is basic Grey Lemonade and I have used my MS doily lace punch for the border detail. I have also embossed a panel with my d'vine swirl folder but you can't see it on the picture as it is behind the propped up element of the card.


Finally, my usual close up


Supplies
Card/Paper: Pink and White card, Basic Grey - Lemonade
Stamps: Magnolia - Tilda with Bike - Lazy Summer Days Collection
Colouring: Copics
Embellishments: Ribbon, button, jewels
Tools: MS doily lace punch, nesties, cuttlebug, d'vine swirl folder

Thanks for looking x

Friday, November 6, 2009

Quixotic Challenge 1


Hello everyone, today's card is for the very first challenge on the Quixotic Challenge blog and they have a theme of birthdays...nice and easy!


I have done another easel card.... I just love these, they are so easy to do but I think they look so effective and it is a bit of a change from a normal fold! I have used Tilda with Ice Cream from the Magnolia Lazy Summer Days Collection and she is coloured with copics and highlighted with stickles. My DP is Basic Grey Lemonade and I think these are my favourite papers at the moment!


I have taken another picture so you can see it from a different angle. I used my MS doily lace punch for the middle panel and I finished off with some jewels.


Finally, my usual close up!


Supplies
Card/Paper: Blue and White card, Basic Grey - Lemonade
Stamps: Magnolia - Tilda with Ice Cream - Lazy Summer Days Collection
Colouring: Copics - E00, E51, R20, E21, E33, E35, E29, C1, 0, BG01, BG09, RV02, RV04, RV10, G00. Inkssentials pen for highlights.
Embellishments: Jewels, ribbon, stickles
Tools: Cuttlebug, Nesties, MS Doily Lace punch

Thanks for looking x

Thursday, November 5, 2009

A Tilda 3 in 1


Helloe everyone, my card for today covers three challenges; Creative Card Crew Challenge 35 which has a theme of ribbons and gems, My Time to Craft Challenge 84 which has a theme of scallops and finally Magnolia Down Under Challenge 25 which has a theme of distressing.


I'm not to happy with how this card turned out and I just couldn't put my finger on it.... then I realised that I hadn't matted my centre panel.... I must have been having a brainless moment!!!.... never mind. My image is from the Magnolia Lazy Summer Days Collection and it is coloured with copics. The papers are MME and I have distress all the edges with spiced marmalade distress ink - I'm not good at tearing and roughing things up, but I can manage distressing with ink....but only just!!!


Finally, my usual close up.

Supplies
Card/Paper: Green and cream card, MME - Bloom and Grow
Stamps: Magnolia - Strawberry Tilda - Lazy Summer Days Collection
Colouring: Copics, Spiced Marmalade Distress ink for the edges, Inkssential pen for highlights
Embellishments: Ribbon and Jewels
Tools: Fiskars threading water punch, Cuttlebug, Paisley folder, TH inking tool

Thanks for looking x

Tuesday, November 3, 2009

Sneak Peek - So Jolly Collection 2009 & a Reminder

Hello everyone, this is just a quick reminder to let you know that today is the last day for ordering the Stamp Club Winter & Christmas Collection 2009.


Also, this is a little sneak peek from the So Jolly collection....isn't she sweet. The So Jolly, Under the Mistletoe and So Snowy Collections will be available soon.